
Setting up SDL 3 on VSCode
Last Updated: Oct 18th, 2026
1) Now that you've set up SDL at a system level, create a project
directory for your workspace. For this tutorial we'll have our workspace at
2) Go to Terminal -> Run Build Task: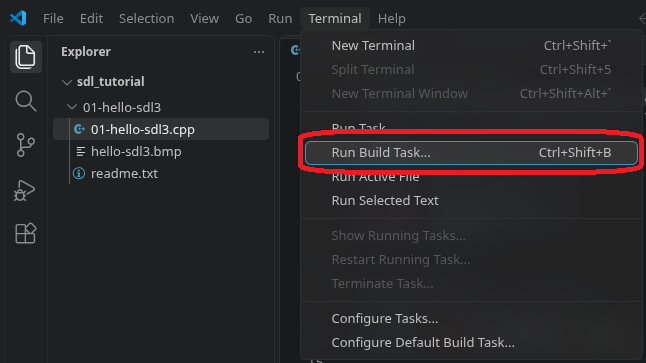 and you should find that it complains that there are no build tasks:
 In order to be able to generate build tasks to compile out application, we need to install the C/C++
extensions for VSCode.
Go to the extensions view, search for "C++" and install the C/C++ Extensions Pack: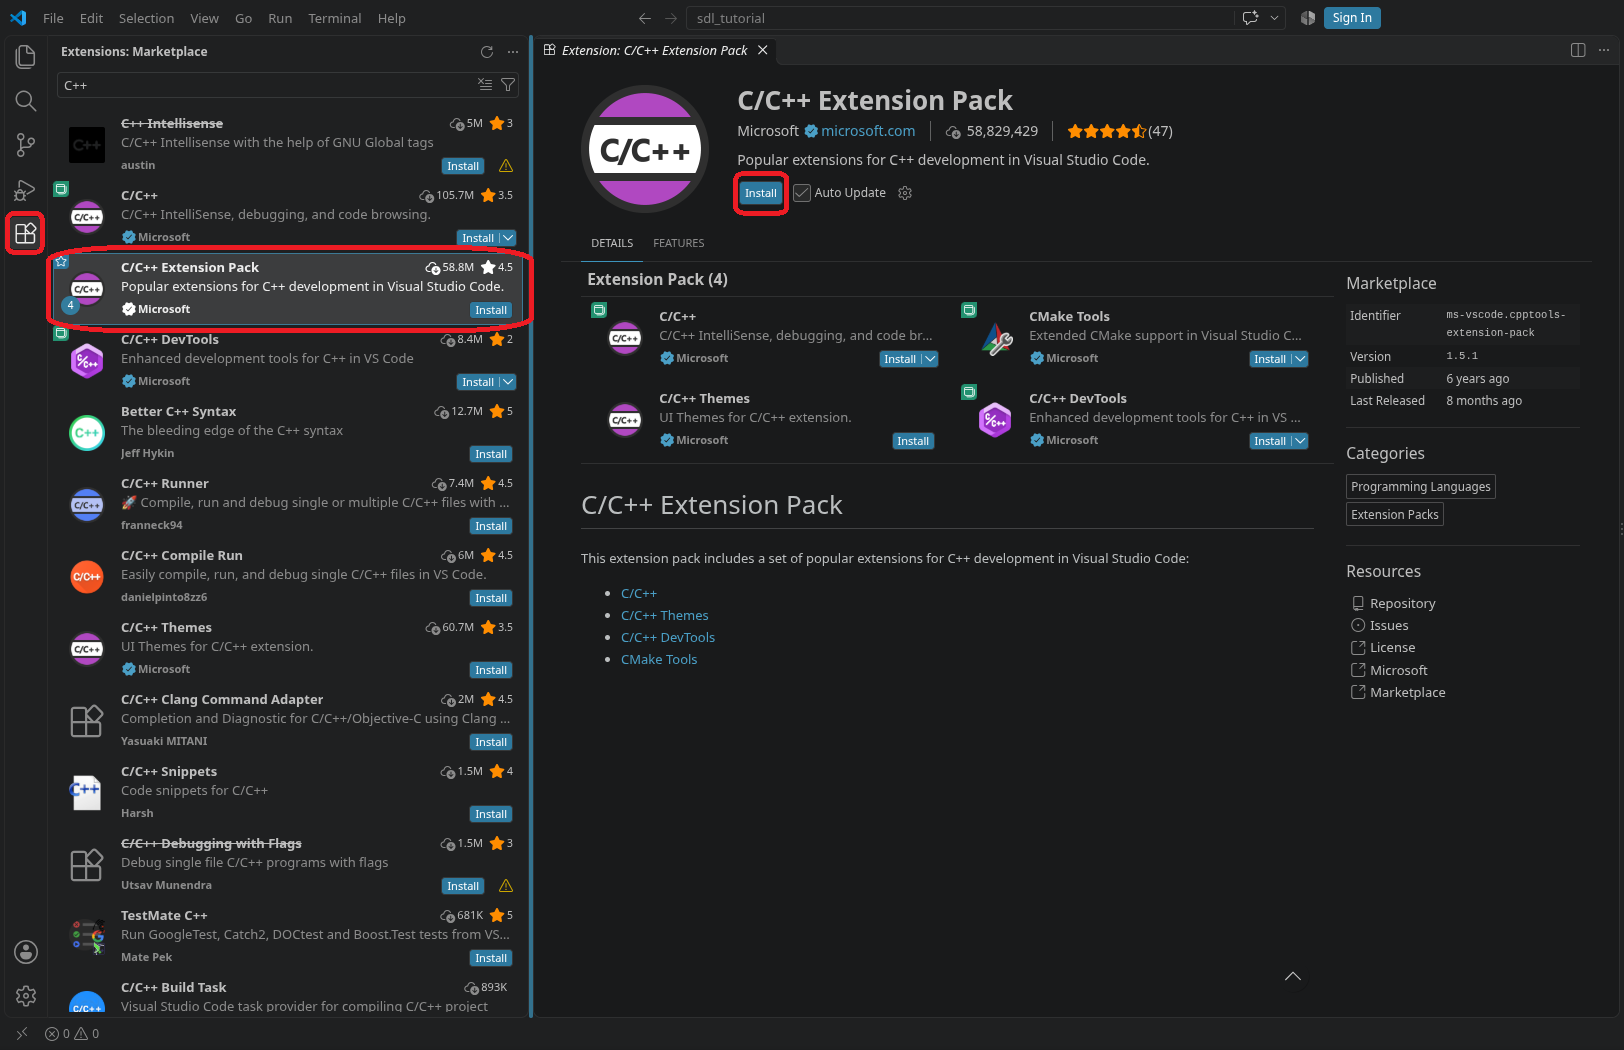
3) In the terminal menu select Configure Default Build Task: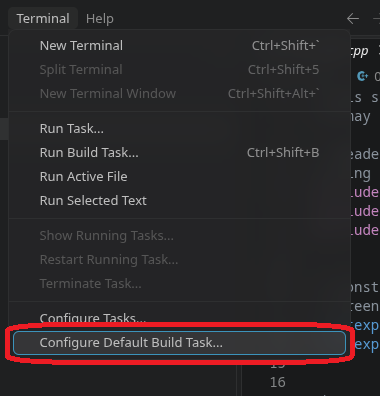
We'll be using GNU C++ for this tutorial so select g++ Build Active File: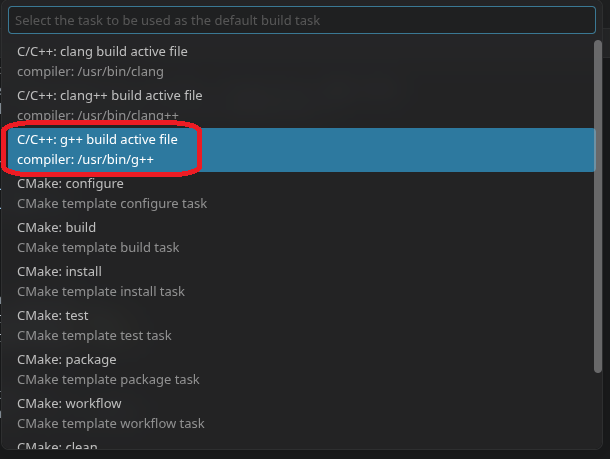 This should generate
If you try to build now, you may get a
4) Select the cpp file and Run Build Task. You're probably going to get a bunch of linker errors like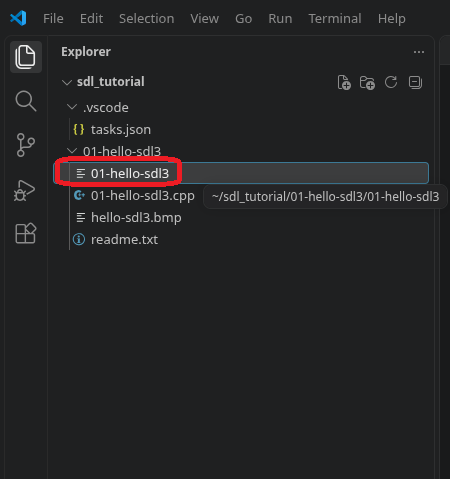 We want the binary to be at the workspace root, so open up
6) Let's try to debug the program by going to Run -> Start Debugging: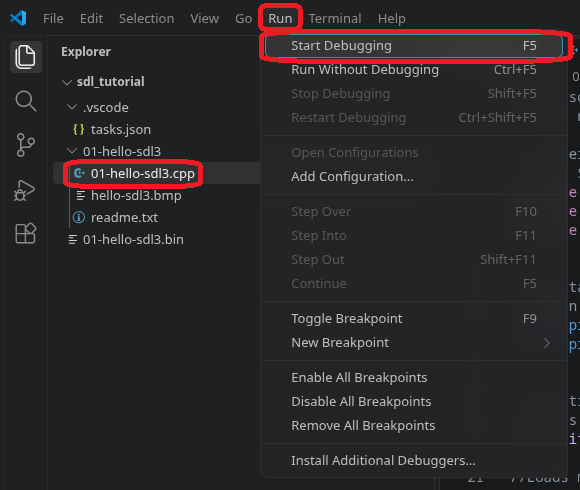 You will likely get the following error:
Open up the Run and Debug view, click "create a launch.json File", and select "C/C++: (gdb) Launch":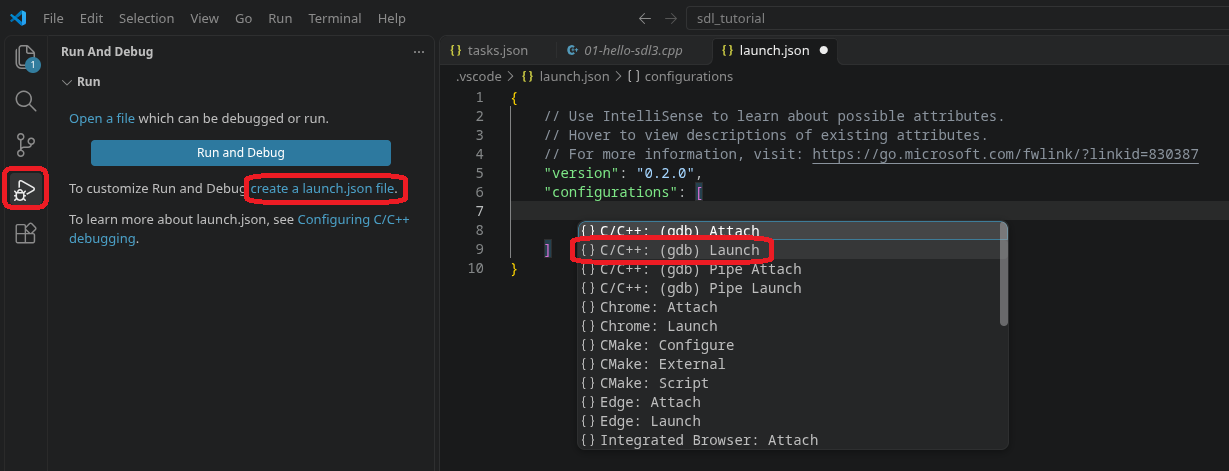 The
7) Try to Debug the program again and you should get an error: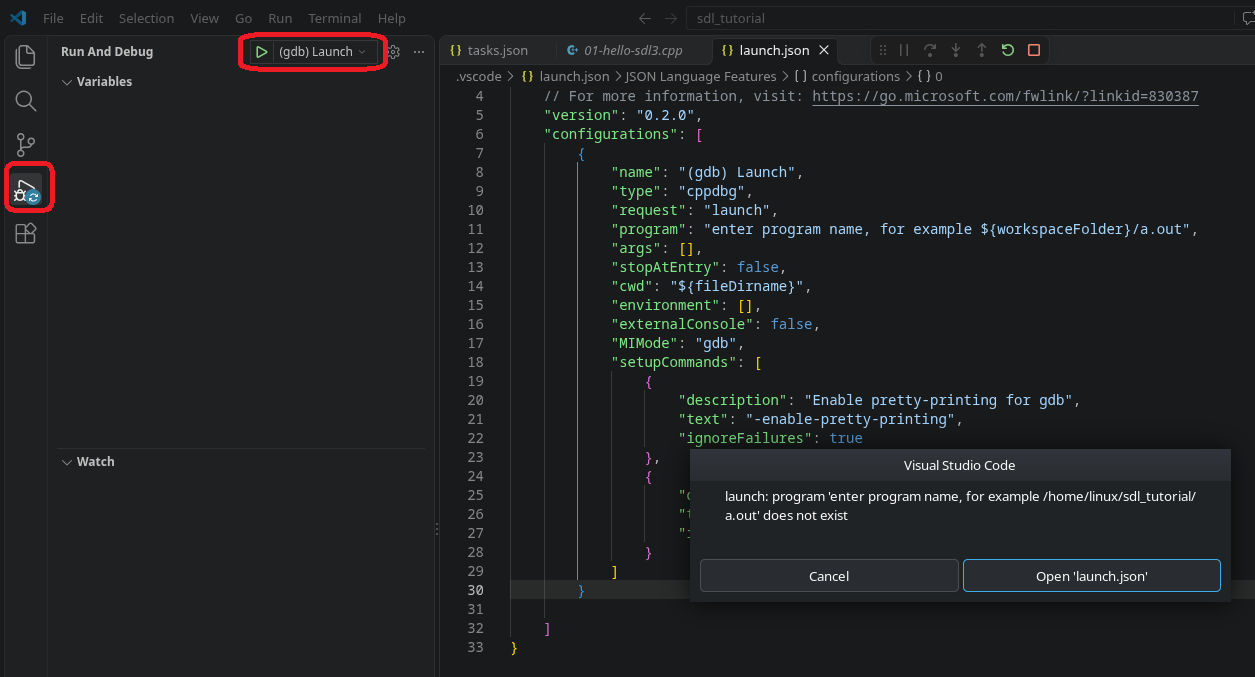 This is because we left the placeholder text from the launch.json generator.
To fix this open up the
8) Try to debug the program again and you will encounter a familiar error:
Open up
So if our workspace folder is at
9) Now the application should build and run without issue. However, there are some clean up we can do.
In future tutorials, we will want to build multiple source files. we can change the configuration to compile all files in the same directory as the selected file:
With SDL3 set up, you can move onto the second part of the tutorial.
~/sdl_tutorial.2) Go to Terminal -> Run Build Task:
Go to the extensions view, search for "C++" and install the C/C++ Extensions Pack:
3) In the terminal menu select Configure Default Build Task:
We'll be using GNU C++ for this tutorial so select g++ Build Active File:
tasks.json in the .vscode folder. The tasks.json is where you can
put various development tasks like project compilation in.If you try to build now, you may get a
Cannot build and debug because the active file is not a C or C++ source file. error.
The default tasks.json C++ build task compiles the file you currently have selected in the Project Explorer, so you're going to get
this error if you selected a json, bmp, or txt file. Make sure you select the cpp file (will fix this later).4) Select the cpp file and Run Build Task. You're probably going to get a bunch of linker errors like
undefined reference to `SDL_Init'. To fix this go into tasks.json and add in the linker flags:
                "args": [
                "-fdiagnostics-color=always",
                "-g",
                "${file}",
                "-lSDL3",
                "-o",
                "${fileDirname}/${fileBasenameNoExtension}"
            ],
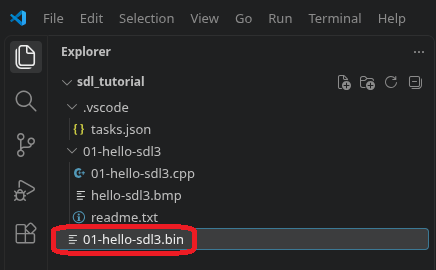
tasks.json and edit the output path of the binary:
                "args": [
                "-fdiagnostics-color=always",
                "-g",
                "${file}",
                "-lSDL3",
                "-o",
                "${workspaceFolder}/01-hello-sdl3.bin"
            ],
6) Let's try to debug the program by going to Run -> Start Debugging:
Unable to load image 01-hello-sdl3/hello-sdl3.bmp! SDL Error: Couldn't open 01-hello-sdl3/hello-sdl3.bmp: No such file or directory
Unable to load media!
Open up the Run and Debug view, click "create a launch.json File", and select "C/C++: (gdb) Launch":
launch.json holds configuration for launching/debugging our program.7) Try to Debug the program again and you should get an error:
To fix this open up the
launch.json and update the program field to run our program:"program": "${workspaceFolder}/01-hello-sdl3.bin",8) Try to debug the program again and you will encounter a familiar error:
Unable to load image 01-hello-sdl3/hello-sdl3.bmp! SDL Error: Couldn't open 01-hello-sdl3/hello-sdl3.bmp: No such file or directory
Unable to load media!
launch.json to set our working directory, but we haven't set the working directory yet.Open up
launch.json and set the working directory parameter:"cwd": "${workspaceFolder}",So if our workspace folder is at
~/sdl_tutorial and we want to load 01-hello-sdl3/hello-sdl3.bmp,
we need to place it at ~/sdl_tutorial/01-hello-sdl3/hello-sdl3.bmp.9) Now the application should build and run without issue. However, there are some clean up we can do.
In future tutorials, we will want to build multiple source files. we can change the configuration to compile all files in the same directory as the selected file:
            "args": [
                "-fdiagnostics-color=always",
                "-g",
                "${fileDirname}/*.cpp",
                "-lSDL3",
                "-o",
                "${workspaceFolder}/${fileDirname}.bin"
            ],
            "args": [
                "-fdiagnostics-color=always",
                "-g",
                "${workspaceFolder}/01-hello-sdl3/*.cpp",
                "-lSDL3",
                "-o",
                "${workspaceFolder}/01-hello-sdl3.bin"
            ],
With SDL3 set up, you can move onto the second part of the tutorial.