
Setting up SDL_image on iOS with XCode 14.1
Last Updated: Nov 7th, 2022
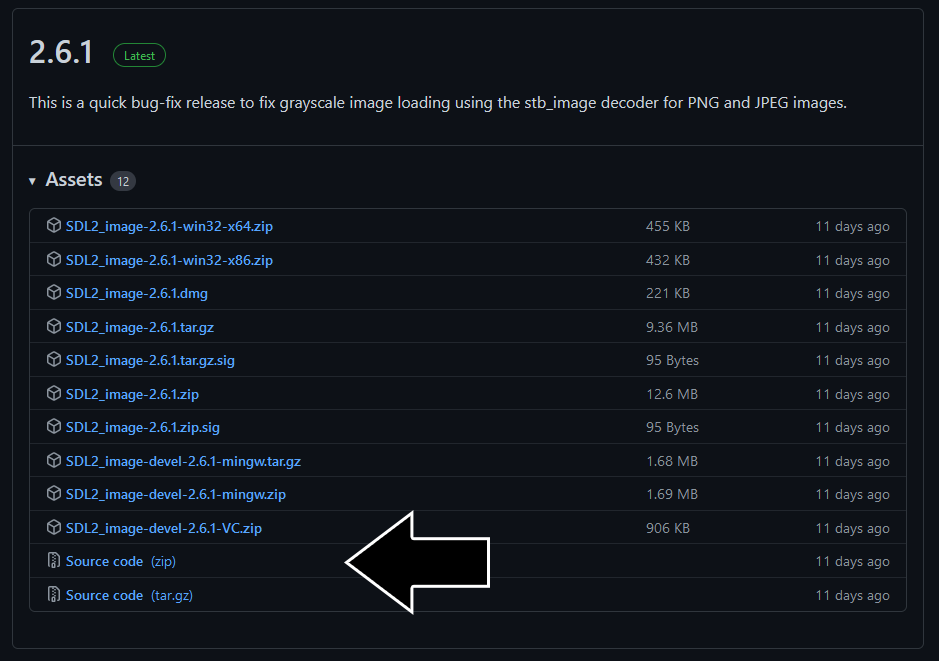
1) First, download the SDL_image source on this page.
Extract the folder inside to your development directory.
2) Go inside the source code folder and look for the external folder. The external folder is supposed to have the external libraries used by the extension. There should be a download.sh shell script. If there isn't you can download it here. Run download.sh inside of the external folder so the specific versions of the external libraries can get pulled down.
3) Open up your SDL project. Add the SDL_image XCode project inside of the source directory: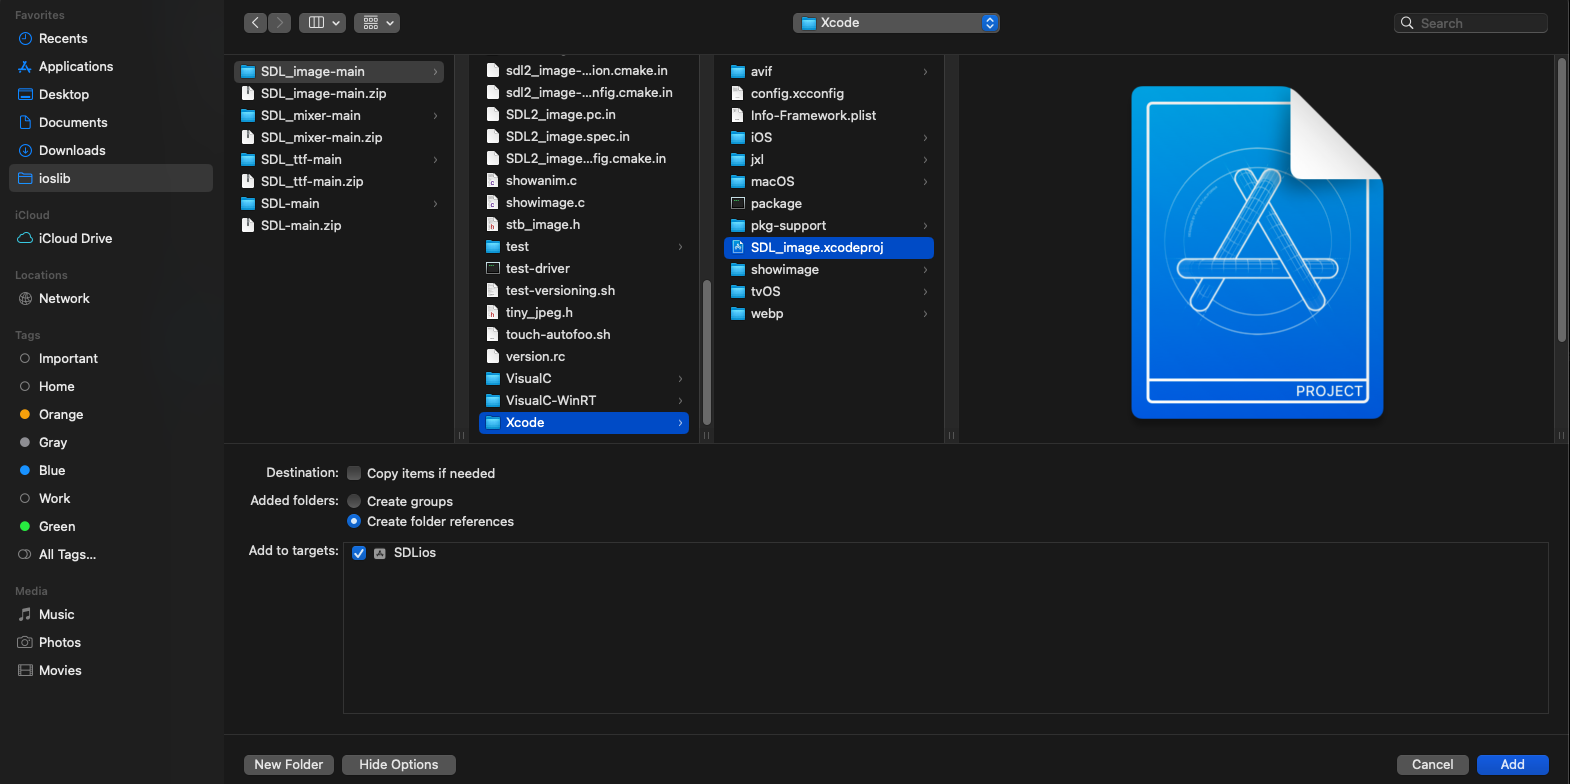
3) Add the public SDL_image headers to the header search paths like we did with the SDL 2 public headers: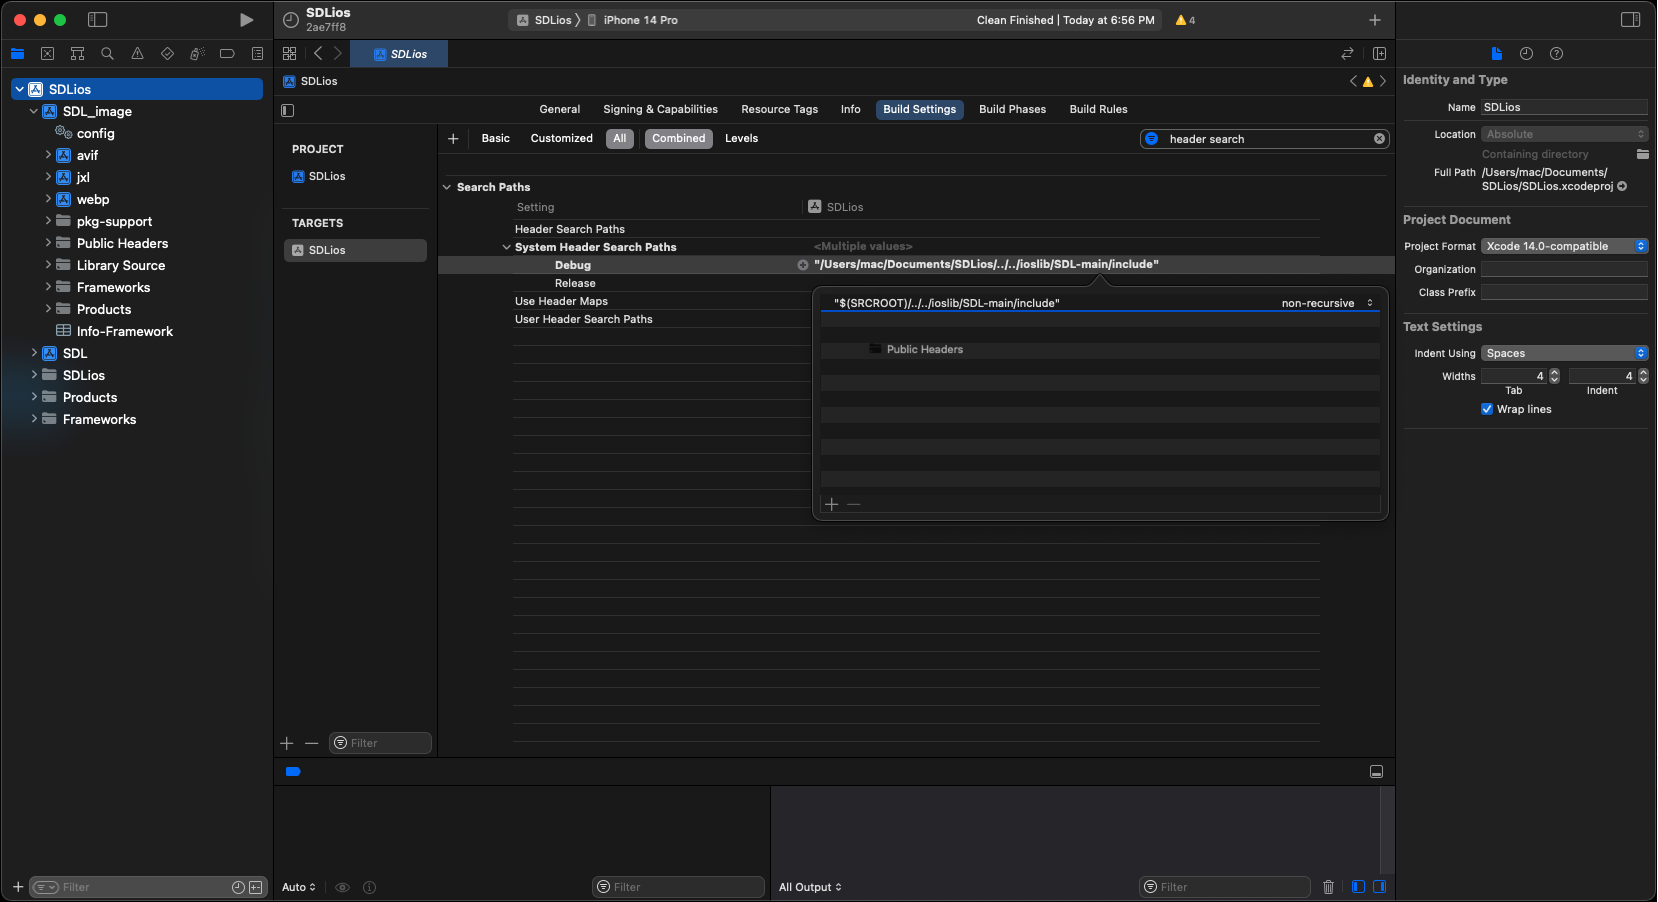
4) Add the regular SDL_image framework to your project: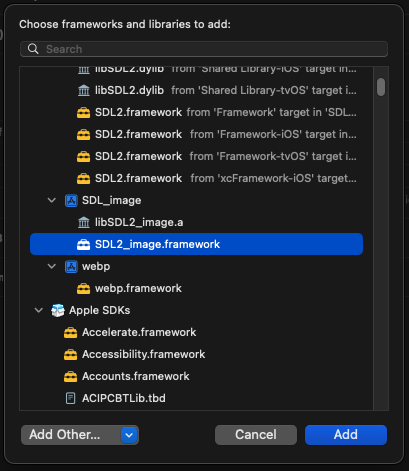
5) Make sure the SDL_image framework is marked to embed and sign: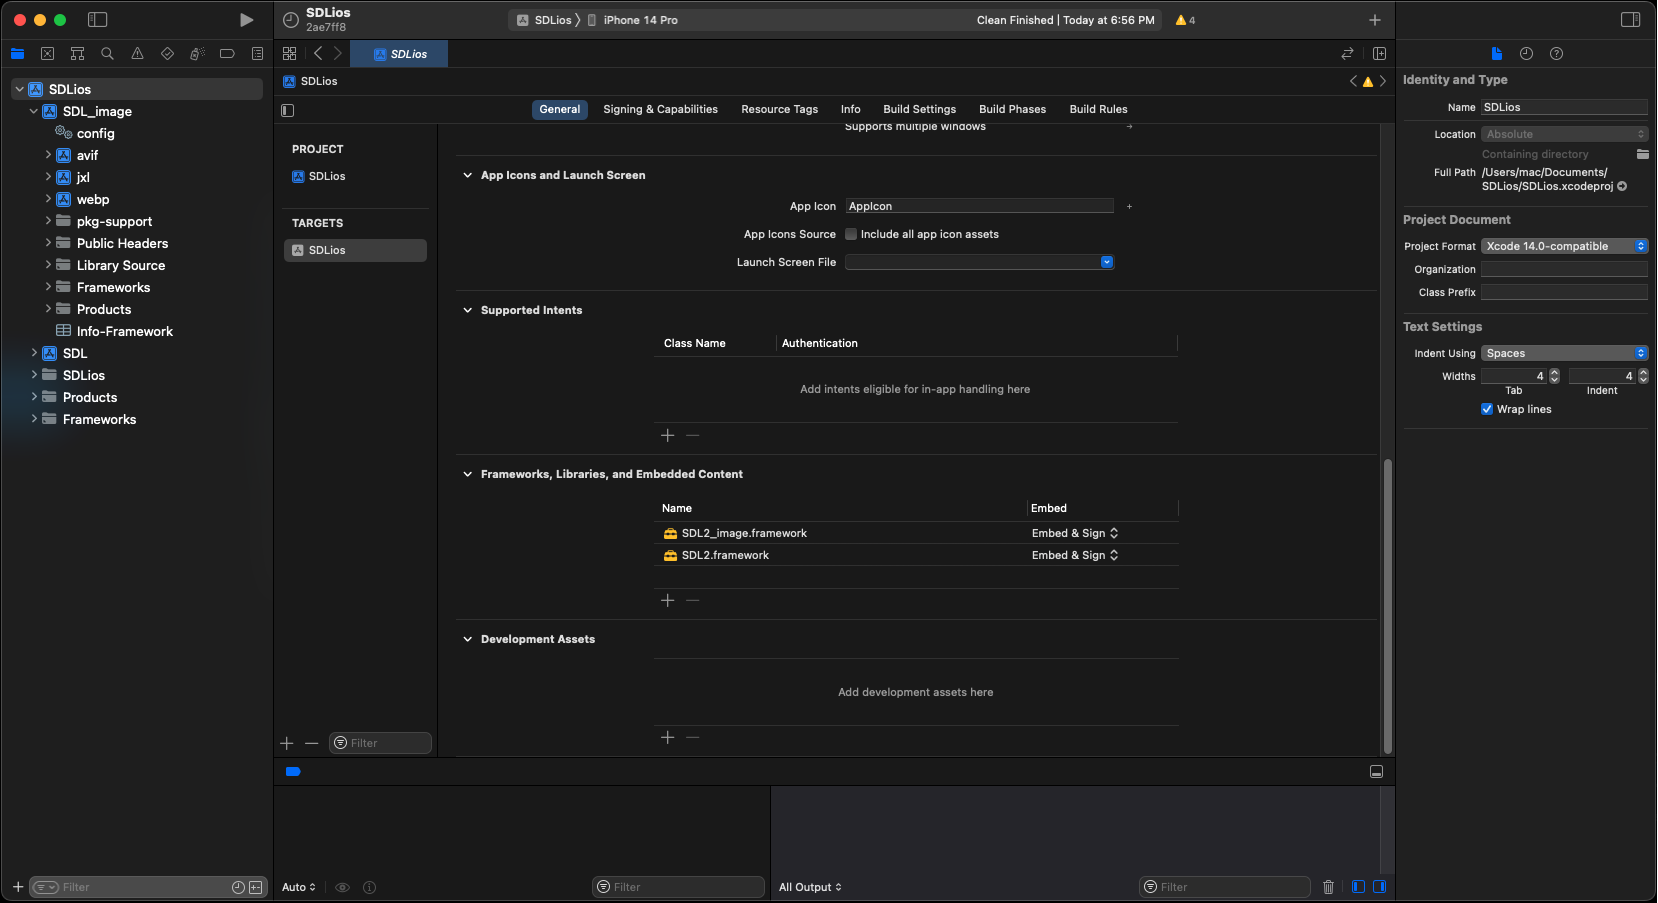
6) If you try to build now, SDL_image will complain that it can't find SDL.h. This means you need to add the SDL 2 public headers to SDL_image much like you added it to your main SDL project: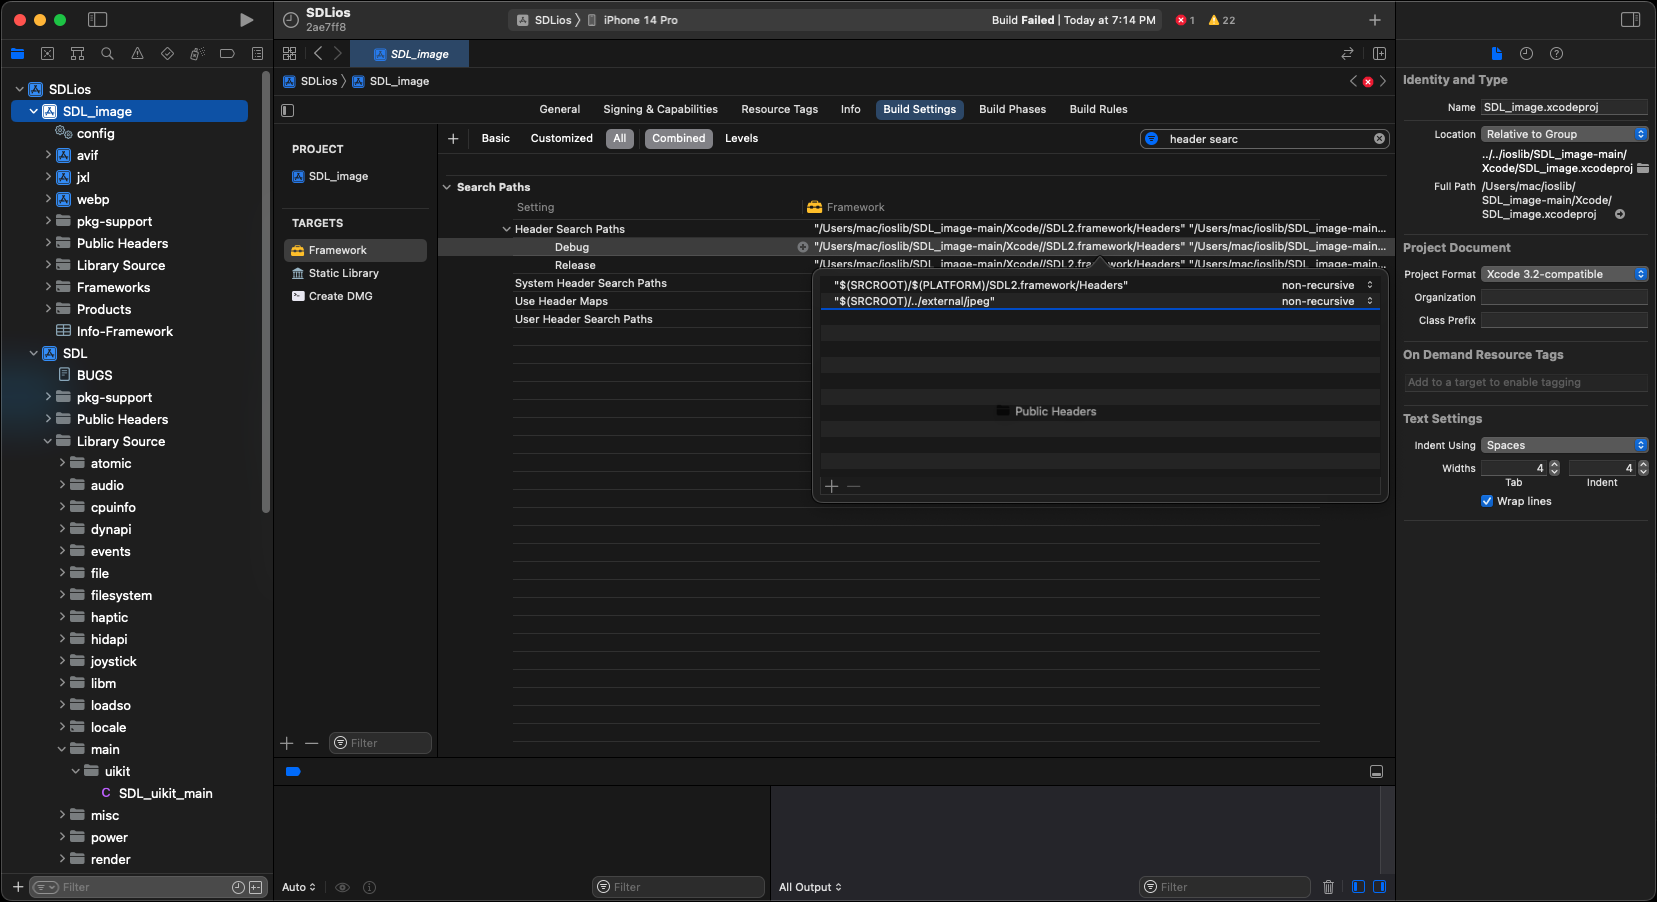
7) Download the demo source/assets. Extract source file and add it to the project. If you try to build now, you'll get an error about missing header files. In 53_extensions_and_changing_orientation.cpp, change
8) Add the media files like you did before and the project should now build and run. Now that the application built, it's time to go over the source code.
Extract the folder inside to your development directory.
2) Go inside the source code folder and look for the external folder. The external folder is supposed to have the external libraries used by the extension. There should be a download.sh shell script. If there isn't you can download it here. Run download.sh inside of the external folder so the specific versions of the external libraries can get pulled down.
3) Open up your SDL project. Add the SDL_image XCode project inside of the source directory:
3) Add the public SDL_image headers to the header search paths like we did with the SDL 2 public headers:
4) Add the regular SDL_image framework to your project:
5) Make sure the SDL_image framework is marked to embed and sign:
6) If you try to build now, SDL_image will complain that it can't find SDL.h. This means you need to add the SDL 2 public headers to SDL_image much like you added it to your main SDL project:
7) Download the demo source/assets. Extract source file and add it to the project. If you try to build now, you'll get an error about missing header files. In 53_extensions_and_changing_orientation.cpp, change
#include <SDL_image.h> to #include <SDL2_image/SDL_image.h>.8) Add the media files like you did before and the project should now build and run. Now that the application built, it's time to go over the source code.