Setting up SDL 2 on XCode 15.1
Last Updated: Jan 7th, 2024
1)
In XCode, create a new MacOS app:
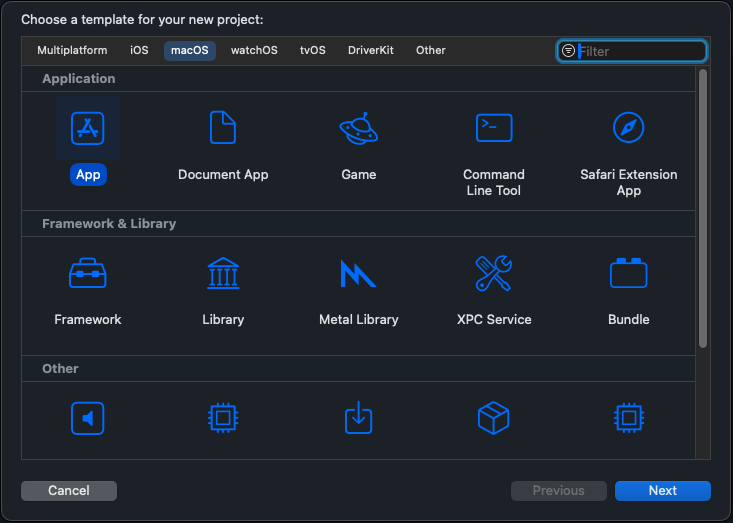
Set the interface to XIB and language to Objective-C. The other parameters like product name you can set however you want: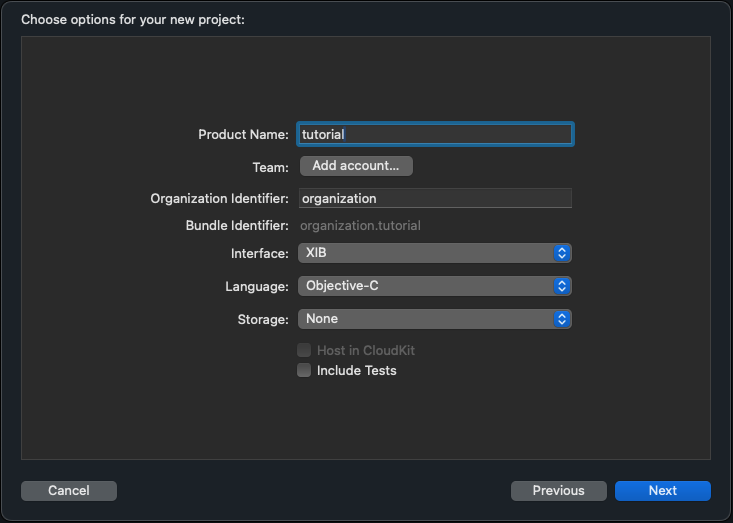 You can also place the project where ever you want, I am putting it in the user Documents folder.
2) In your project, delete the AppDelegate.h/AppDelegate.m, main.m, and main.xib: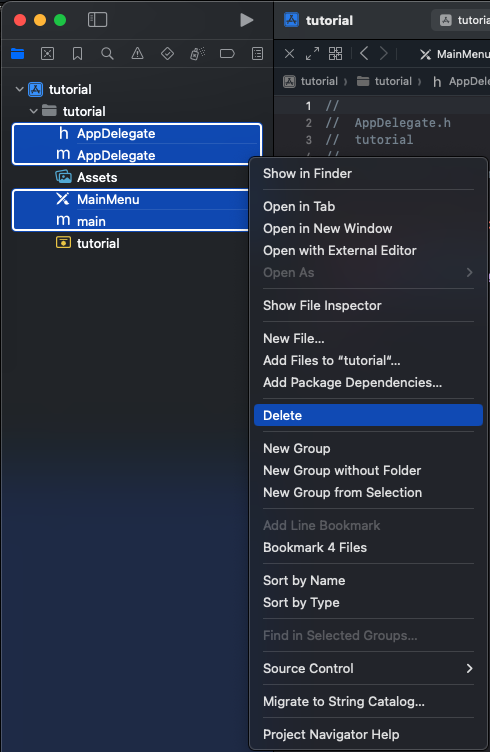 Make sure to leave everything else.
3) Go download the OS X development libraries from the SDL GitHub.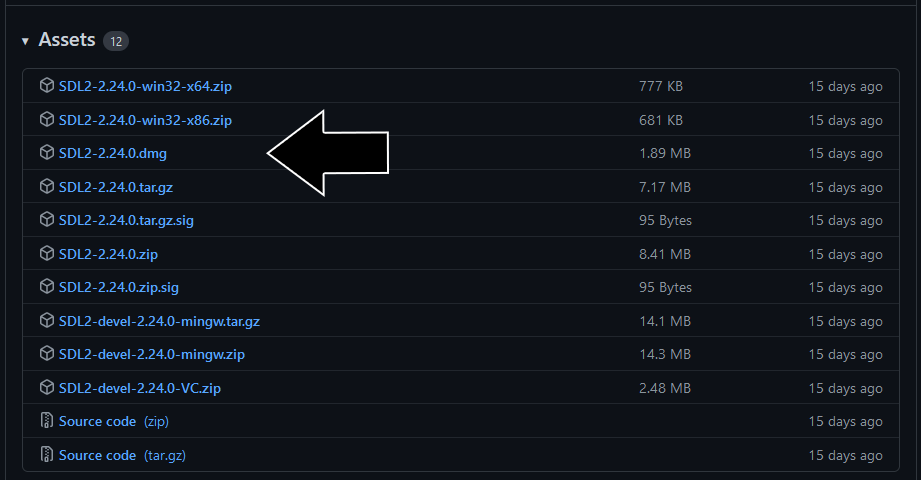
Open the dmg and then drag the SDL2.framework folder to place it alongside your xcodeproj file in your project folder: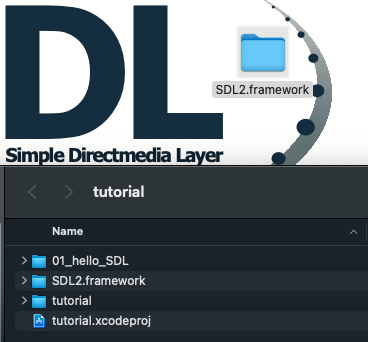
4) Now go download the source for lesson 01 and add the cpp file to your project alongside your Assets.xcassets folder. Try to build it and you will get an error about not being able to find SDL.h.
By default in the tutorials, the SDL headers are included like this:
SDL on Mac OS X does things differently, so we have to include the headers like this:
If you change that include and try to build, you will still get errors. While the include is now correct, we need to tell XCode to include the SDL2 framework we downloaded. Select your project and go to General -> Frameworks, Libraries, and Embedded Content -> click the plus sign to add items: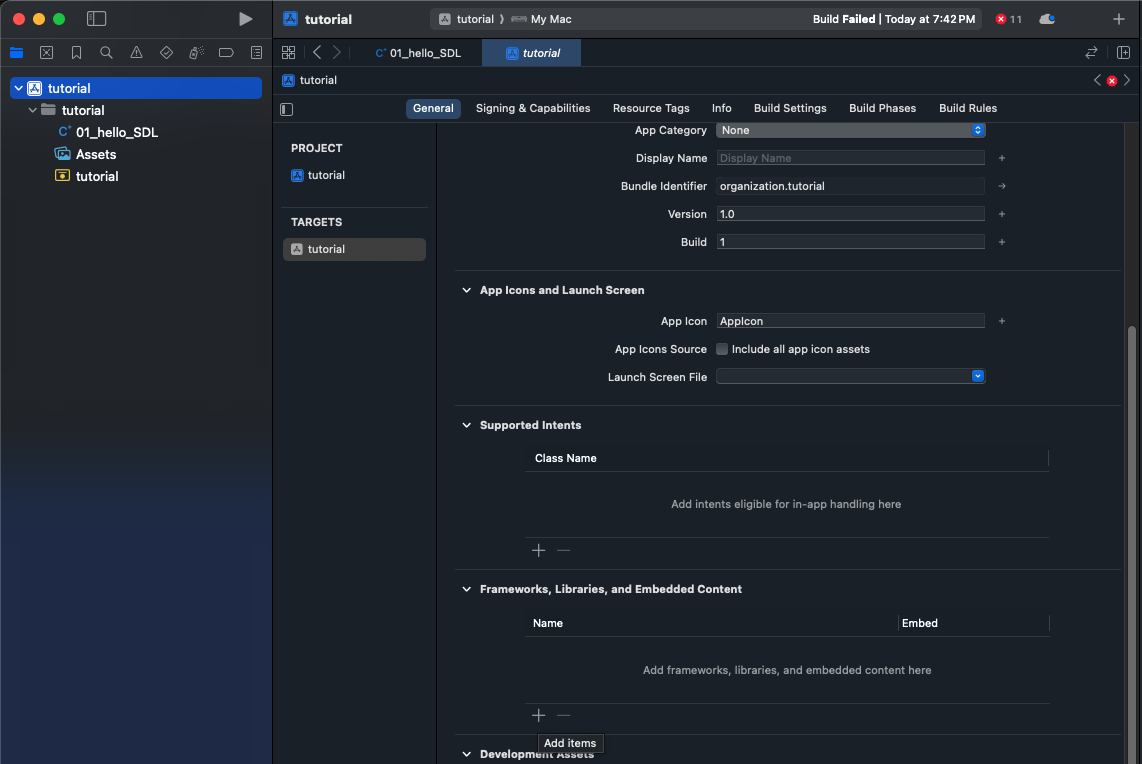
Click Add Other, then Add Files: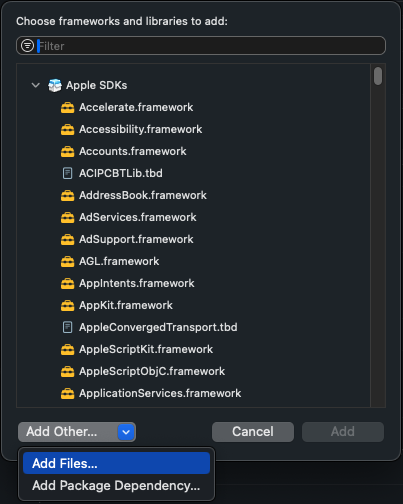
And open the SDL2.framework: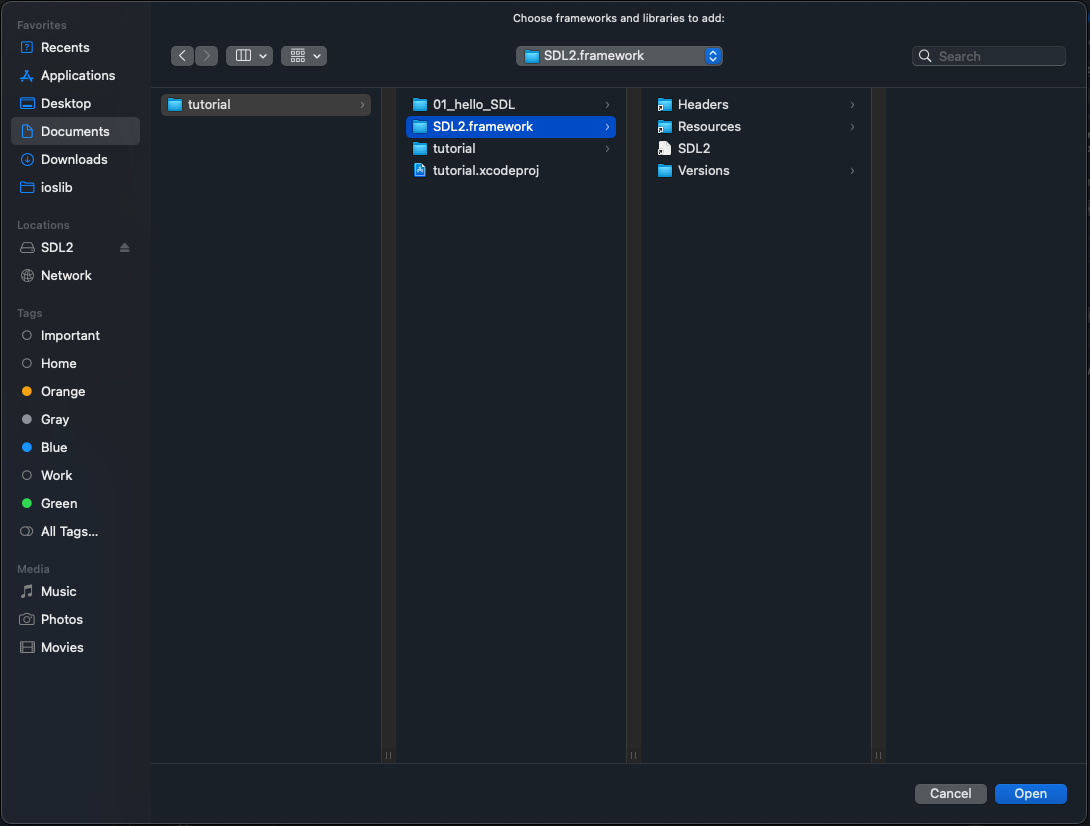
5) The project should now build and a blank window should appear.
If you want to load files like images (as you will in the next tutorial), you need to add them to your project. As an example, go download the source for the next tutorial. Remove the source from the current tutorial, and replace it with the source from the next tutorial. Don't forget to edit the include for the header.
If you build and run the application now, it will build and run but return a non-zero because it cannot find the files for tutorial. To add the files to the app, copy the 02_getting_an_image_on_the_screen folder from the zip and place it alongside the xcodeproj file with the SDL2.framework folder. In your project, right click to add files to your project and select the 02_getting_an_image_on_the_screen folder making sure that Create Folder References is selected. Adding it as a folder reference essentially makes that folder part of the app's directory structure: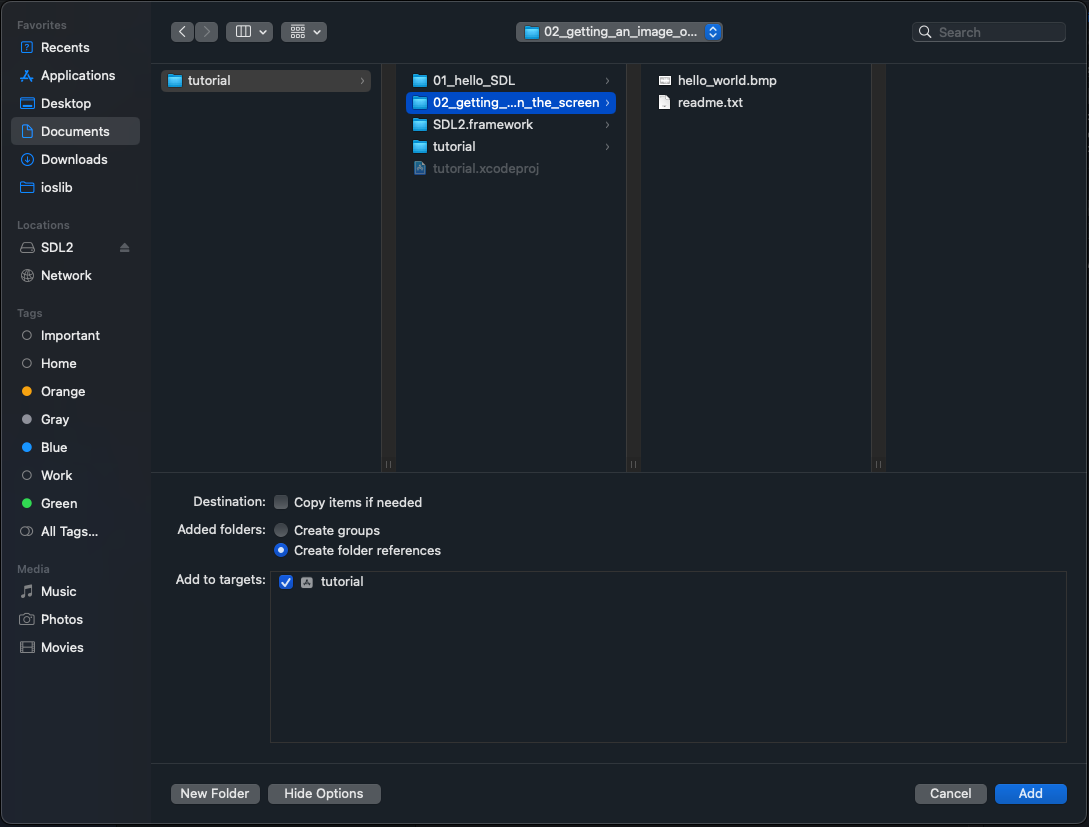
Build and run and the image should show up. We'll cover how to load images in the next tutorial but for now let's cover how to create windows.

Set the interface to XIB and language to Objective-C. The other parameters like product name you can set however you want:

2) In your project, delete the AppDelegate.h/AppDelegate.m, main.m, and main.xib:

3) Go download the OS X development libraries from the SDL GitHub.

Open the dmg and then drag the SDL2.framework folder to place it alongside your xcodeproj file in your project folder:

4) Now go download the source for lesson 01 and add the cpp file to your project alongside your Assets.xcassets folder. Try to build it and you will get an error about not being able to find SDL.h.
By default in the tutorials, the SDL headers are included like this:
#include <SDL/SDL.h>SDL on Mac OS X does things differently, so we have to include the headers like this:
#include <SDL2/SDL.h>If you change that include and try to build, you will still get errors. While the include is now correct, we need to tell XCode to include the SDL2 framework we downloaded. Select your project and go to General -> Frameworks, Libraries, and Embedded Content -> click the plus sign to add items:

Click Add Other, then Add Files:

And open the SDL2.framework:

5) The project should now build and a blank window should appear.
If you want to load files like images (as you will in the next tutorial), you need to add them to your project. As an example, go download the source for the next tutorial. Remove the source from the current tutorial, and replace it with the source from the next tutorial. Don't forget to edit the include for the header.
If you build and run the application now, it will build and run but return a non-zero because it cannot find the files for tutorial. To add the files to the app, copy the 02_getting_an_image_on_the_screen folder from the zip and place it alongside the xcodeproj file with the SDL2.framework folder. In your project, right click to add files to your project and select the 02_getting_an_image_on_the_screen folder making sure that Create Folder References is selected. Adding it as a folder reference essentially makes that folder part of the app's directory structure:

Build and run and the image should show up. We'll cover how to load images in the next tutorial but for now let's cover how to create windows.