Advanced Timers
Last Updated 3/24/14
You've already learned to make a very basic timer. Here you're going to learn to make a timer class with start, stop, and pause functions that you would need when programming a game.A Advanced Timers tutorial with SDL 2 is now available.
//The timer
class Timer
{
private:
//The clock time when the timer started
int startTicks;
//The ticks stored when the timer was paused
int pausedTicks;
//The timer status
bool paused;
bool started;
public:
//Initializes variables
Timer();
//The various clock actions
void start();
void stop();
void pause();
void unpause();
//Gets the timer's time
int get_ticks();
//Checks the status of the timer
bool is_started();
bool is_paused();
};
Here we have the rundown of the timer class.
"startTicks" is the starting point of the timer, and "pausedTicks" is the time the timer had when it was paused.
The constructor initializes the variables, and I'm pretty sure you can figure out what start(), stop(), pause(), and unpause() do.
The function get_ticks() gets the timer's time in milliseconds. is_started() checks if the timer has started, and is_paused() checks if the timer is paused.
Timer::Timer()
{
//Initialize the variables
startTicks = 0;
pausedTicks = 0;
paused = false;
started = false;
}
Here we have the constructor initializing the variables. Nothing much to explain here.
void Timer::start()
{
//Start the timer
started = true;
//Unpause the timer
paused = false;
//Get the current clock time
startTicks = SDL_GetTicks();
}
Now when we start the timer, we set the started status to true, we unpause the timer, and we set our starting time to the current time using SDL_GetTicks().
void Timer::stop()
{
//Stop the timer
started = false;
//Unpause the timer
paused = false;
}
When we stop it, we set the started status to false and we unpause the timer.
int Timer::get_ticks()
{
//If the timer is running
if( started == true )
{
//If the timer is paused
if( paused == true )
{
//Return the number of ticks when the timer was paused
return pausedTicks;
}
else
{
//Return the current time minus the start time
return SDL_GetTicks() - startTicks;
}
}
//If the timer isn't running
return 0;
}
Here we have the function that gets the timer's time.
First we check if the timer is running. If it is, we then check if the timer is paused.
If the timer is paused, we return the time the timer had when it was paused. We'll talk about pausing/unpausing later.
If the timer isn't paused, we return the difference in the time from when the timer started and the current time. As you can see it's the exact same formula from the last tutorial.
If the timer was never running in the first place, the function returns 0.
void Timer::pause()
{
//If the timer is running and isn't already paused
if( ( started == true ) && ( paused == false ) )
{
//Pause the timer
paused = true;
//Calculate the paused ticks
pausedTicks = SDL_GetTicks() - startTicks;
}
}
Now when we want to pause the timer, first we check if the timer is running and if it's not already paused.
If we can pause the timer, we set the paused status to true, and store the timer's time in "pausedTicks".
void Timer::unpause()
{
//If the timer is paused
if( paused == true )
{
//Unpause the timer
paused = false;
//Reset the starting ticks
startTicks = SDL_GetTicks() - pausedTicks;
//Reset the paused ticks
pausedTicks = 0;
}
}
When we want to unpause the timer, we check if the timer is paused first.
If it is, we set the paused status to false, then set the start time to the current clock time minus the time the timer had when it was paused.
Finally, we set "pausedTicks" to 0 for no real reason other than I don't like stray variables.
If it is, we set the paused status to false, then set the start time to the current clock time minus the time the timer had when it was paused.
Finally, we set "pausedTicks" to 0 for no real reason other than I don't like stray variables.
bool Timer::is_started()
{
return started;
}
bool Timer::is_paused()
{
return paused;
}
Here are the functions that check the timer's status. I'm pretty sure you can figure out what they do.
//Make the timer
Timer myTimer;
//Generate the message surfaces
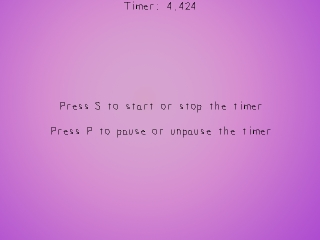
startStop = TTF_RenderText_Solid( font, "Press S to start or stop the timer", textColor );
pauseMessage = TTF_RenderText_Solid( font, "Press P to pause or unpause the timer", textColor );
Now in our main function after we do our initialization and file loading, we declare a timer object and render our message surfaces.
//Start the timer
myTimer.start();
//While the user hasn't quit
while( quit == false )
{
Before we enter our main loop we start the timer.
//While there's an event to handle
while( SDL_PollEvent( &event ) )
{
//If a key was pressed
if( event.type == SDL_KEYDOWN )
{
//If s was pressed
if( event.key.keysym.sym == SDLK_s )
{
//If the timer is running
if( myTimer.is_started() == true )
{
//Stop the timer
myTimer.stop();
}
else
{
//Start the timer
myTimer.start();
}
}
This is where we handle our key presses. When "s" is pressed, if the timer is running it is stopped, otherwise the timer is started.
//If p was pressed
if( event.key.keysym.sym == SDLK_p )
{
//If the timer is paused
if( myTimer.is_paused() == true )
{
//Unpause the timer
myTimer.unpause();
}
else
{
//Pause the timer
myTimer.pause();
}
}
}
Now when "p" is pressed, if the timer is paused we unpause it, otherwise we pause it.
//The timer's time as a string
std::stringstream time;
//Convert the timer's time to a string
time << "Timer: " << myTimer.get_ticks() / 1000.f;
//Render the time surface
seconds = TTF_RenderText_Solid( font, time.str().c_str(), textColor );
//Apply the time surface
apply_surface( ( SCREEN_WIDTH - seconds->w ) / 2, 0, seconds, screen );
//Free the time surface
SDL_FreeSurface( seconds );
//Update the screen
if( SDL_Flip( screen ) == -1 )
{
return 1;
}
}
After the events are handled and the background and message surfaces are blitted we show the timer's time on the screen.
First we create a string stream object, and then we put the timer's time in the string stream. Since we want the timer's time in seconds, we divide it by 1000 since there's 1000 milliseconds per second.
Next, we create a surface from the string holding the timer's time. Then the new surface showing the timer's time is blitted to the screen, then free since we're done with it. After that the screen is updated and we continue the main loop.