
Setting up SDL 2 on iOS with XCode 14.1
Last Updated: Nov 7th, 2022
1) First thing you need to do is download SDL 2 full source. Not just the MacOS libraries, the full source. You will find them on the SDL GitHub, specifically
on this page.
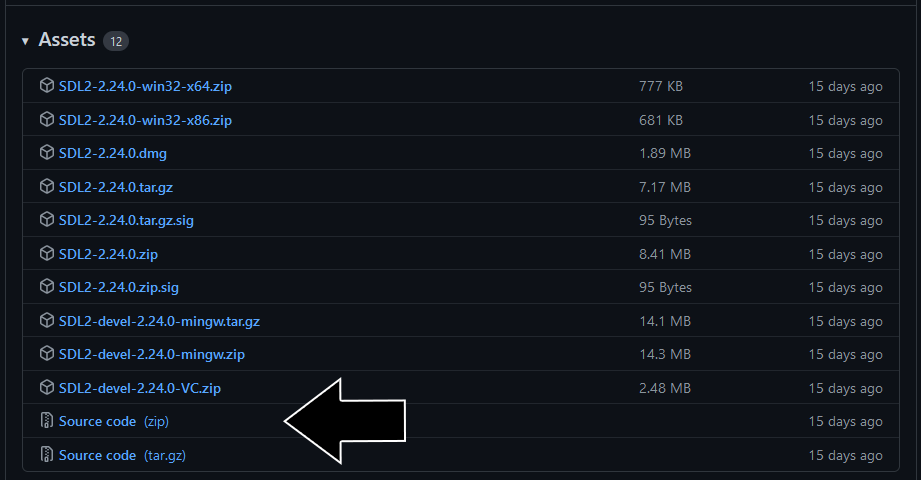
Extract the folder to someplace dedicated to iOS development source code. For this tutorial, we'll be assuming you're going to put it ~/ioslib.
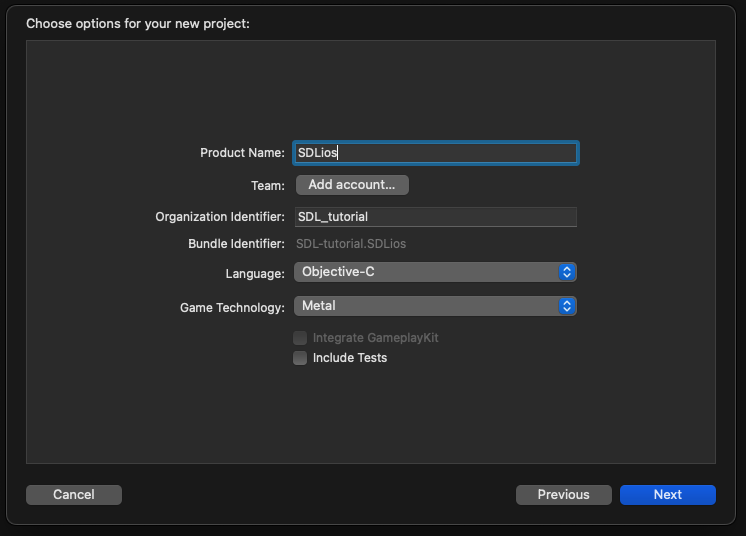
2) Start a new iOS game project: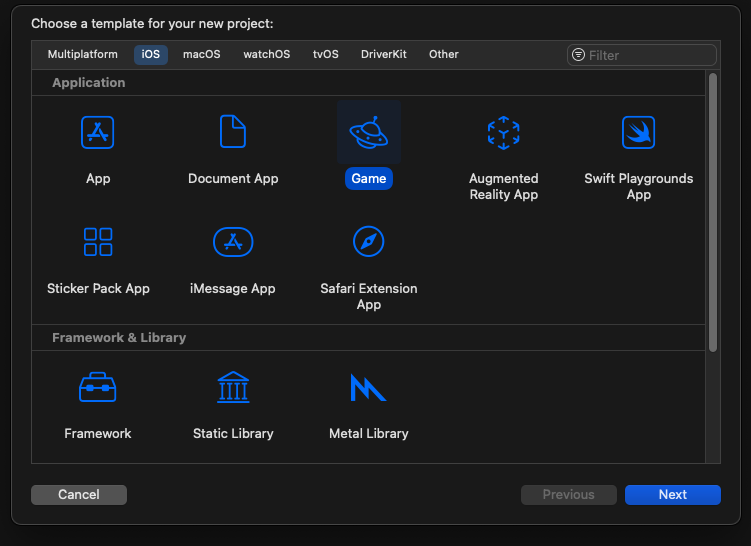 Make sure it's an Objective-C, Metal project:
3) Make sure to delete the auto generated files, except for the Assets and LaunchScreen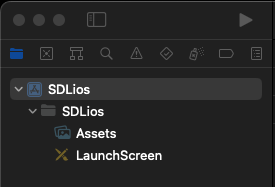
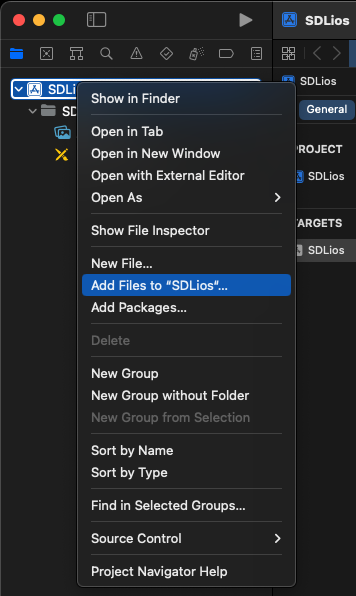
4) We need to add SDL 2 as a sub project to your game project, so right click on your project and select Add Files:
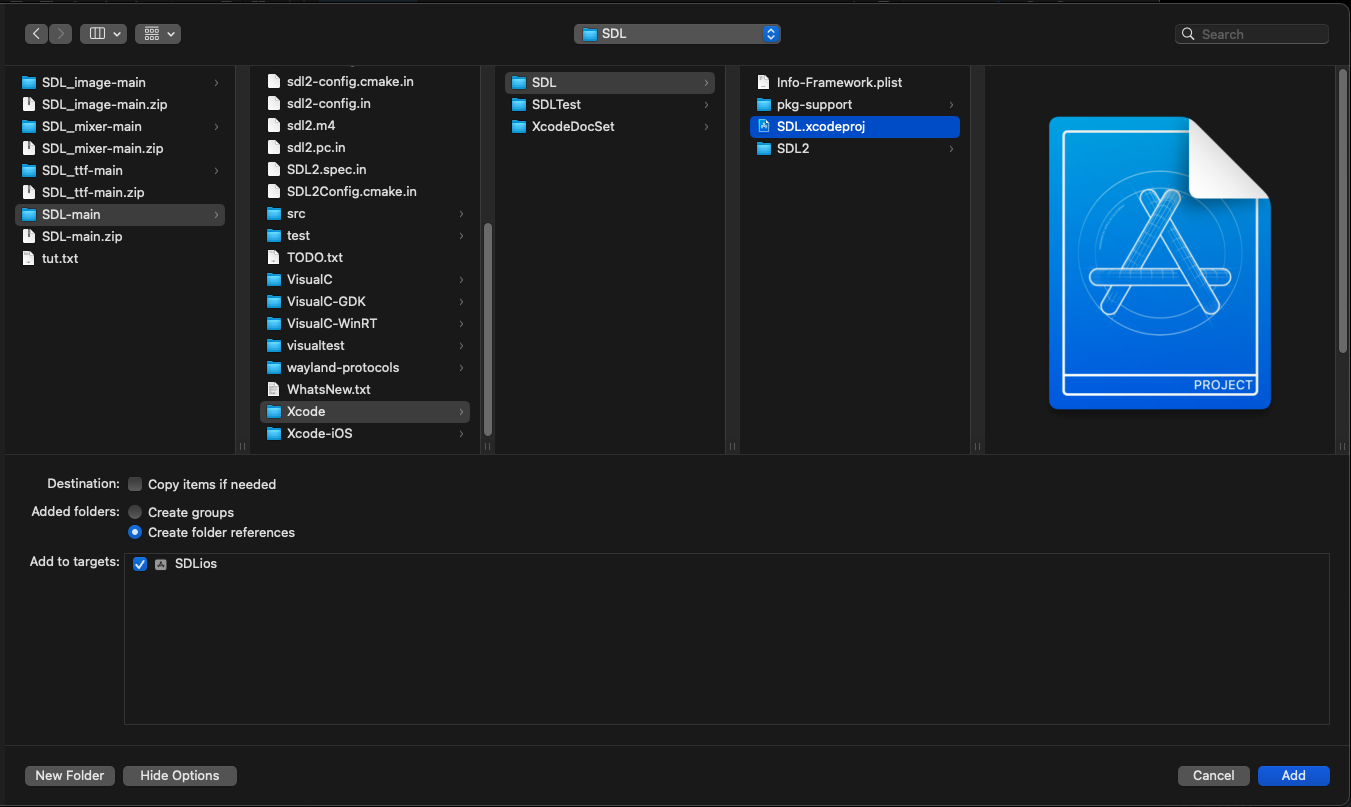
In the SDL 2 source code folder you extracted, go to XCode, SDL, and select SDL.xcodeproj:
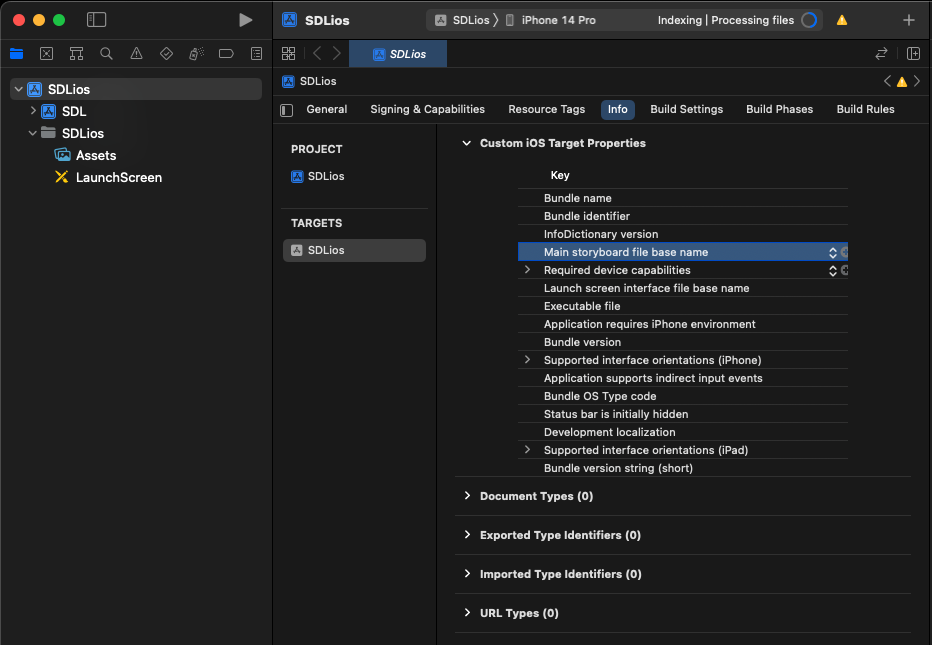
5) Before we continue, remember to always DOUBLE CHECK WHICH PROJECT YOU HAVE SELECTED. Because you have multiple projects in your project, it is very easy to mistakenly make changes to the SDL 2 project when you wanted to make changes to your main project or vice versa.
Select your main project, select the Info tab, select "Main storyboard file base name", and hit delete:
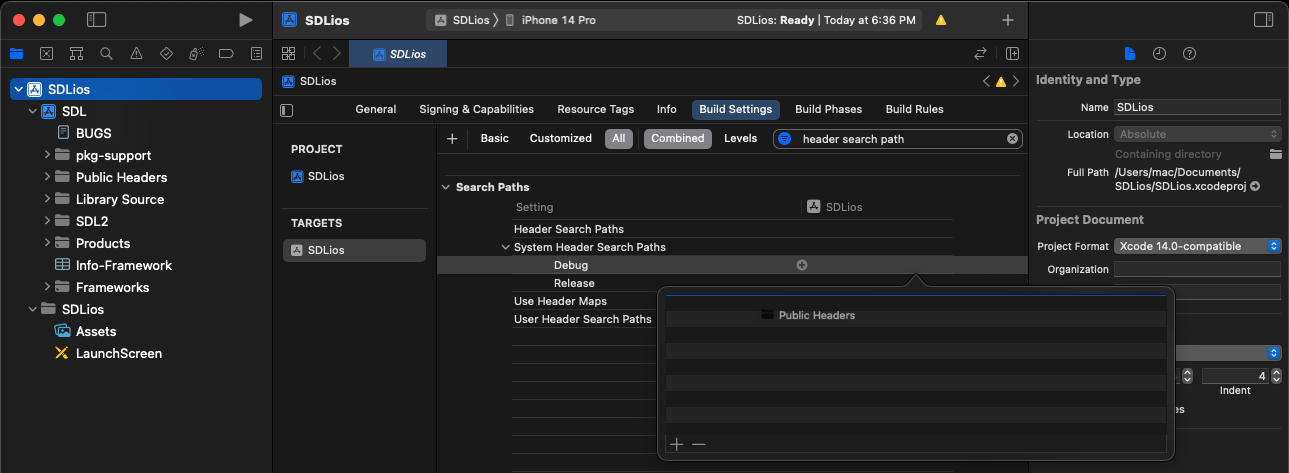
6) Go to Build Settings, select "All" and "Combined", and drag the Public Headers from the project to the Header Search Paths:
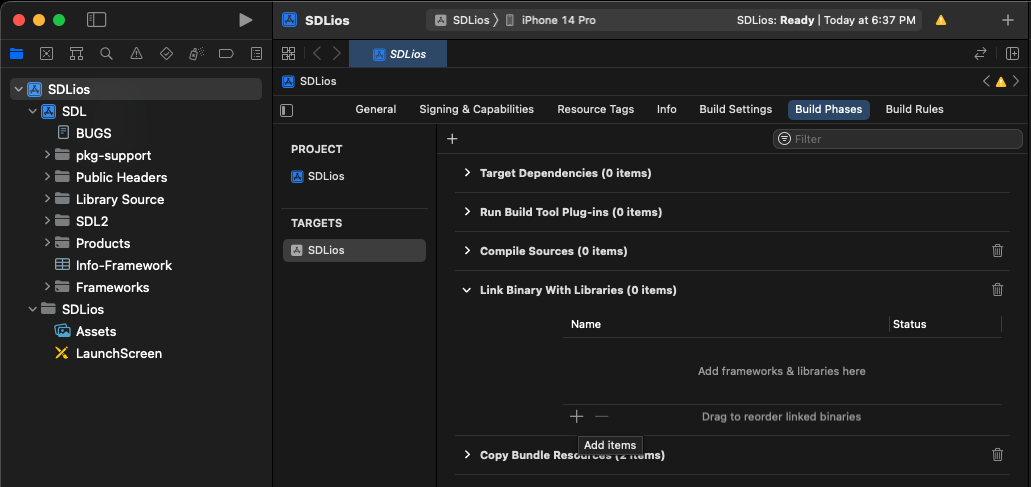
7) Go to Build Phases, open up Link Binary With Libraries, and click the plus to Add items:
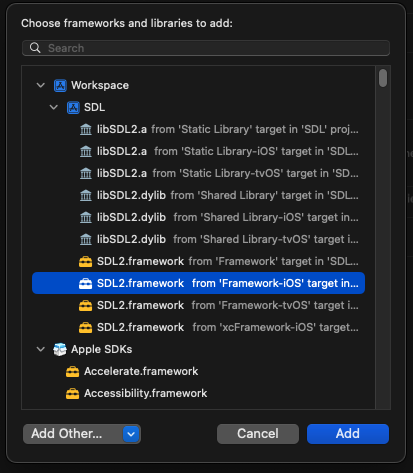
Select the SDL2.framework from Framework-iOS:
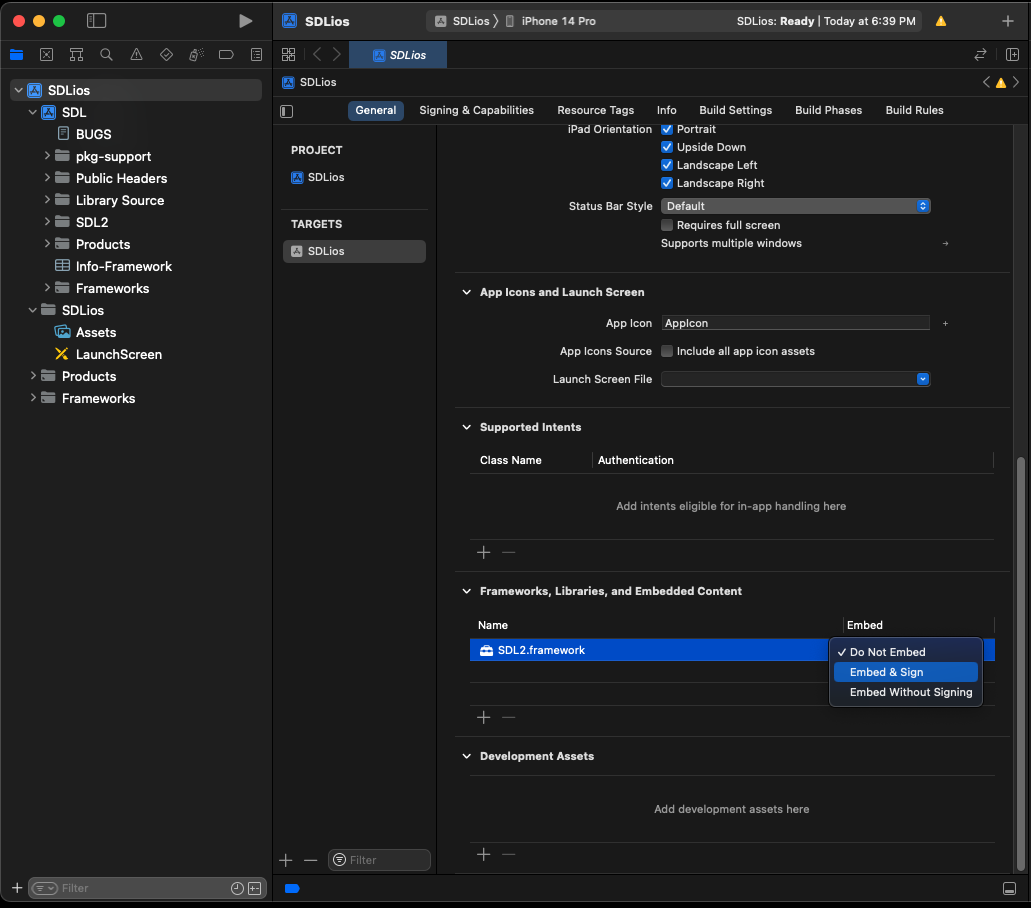
8) Go to the General tab, under Frameworks, Libraries, and Embedded Content, set the framework to Embed and Sign:
9) Download the source for lesson 52. Add the source file to your project. In the SDL subproject inside of the project view, drag SDL/Library Source/main/uikit/SDL_uikit_main.c down to the same place as the tutorial source code.
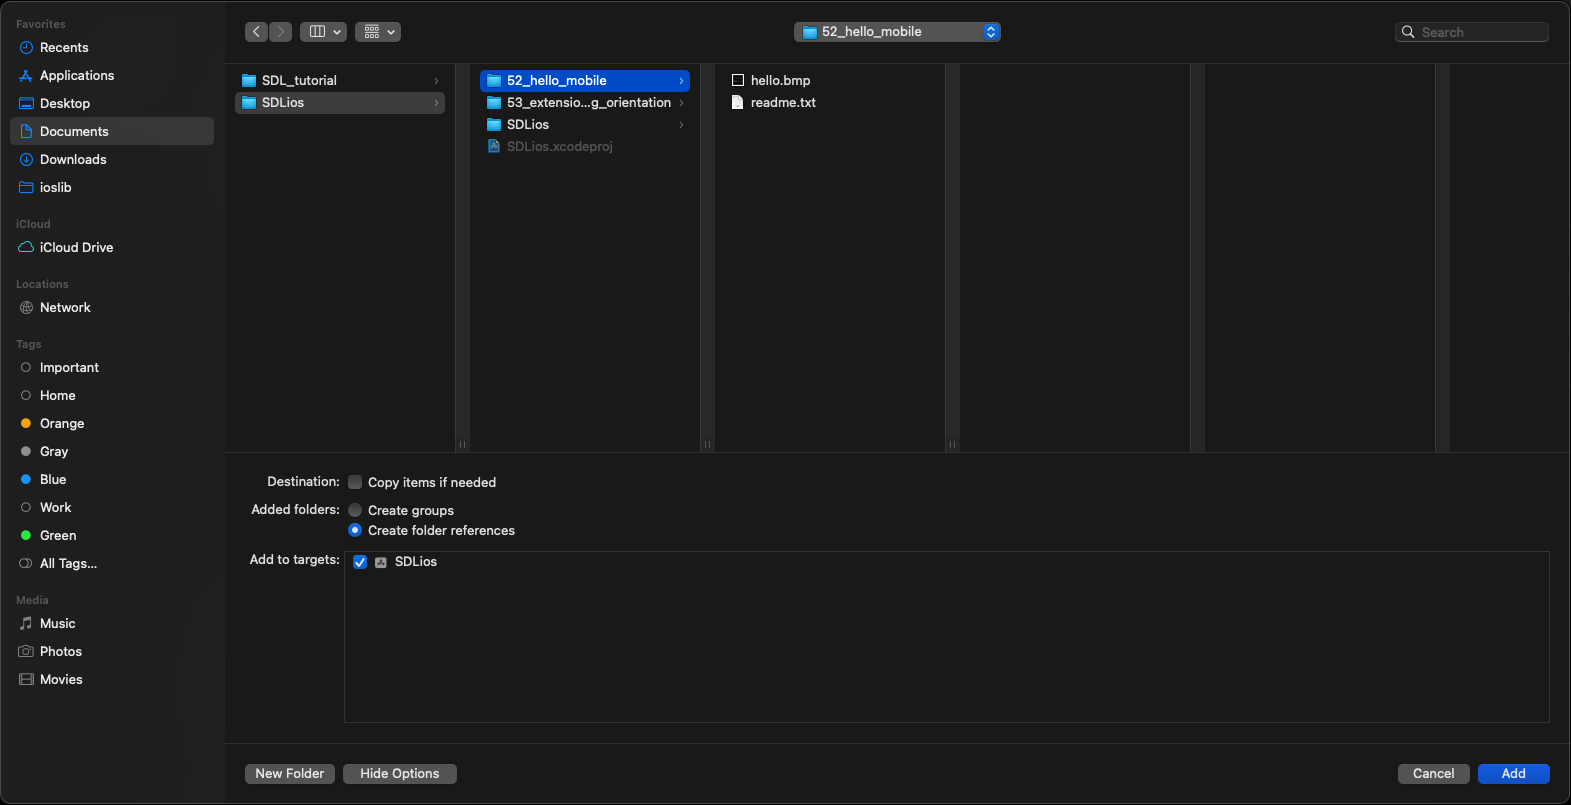
To add media to your project, Add file to your main project, select the folder you want to add, and make sure to "Create folder references" when adding it:
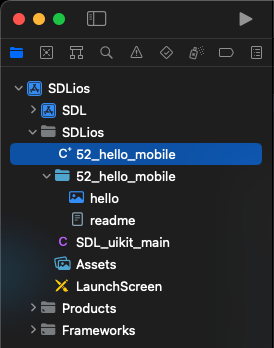
10) Now you should have your source file, media files, and main file added to your project:
Now build and run your application. The simulator can take up to a minute to boot and run so give it time. With the application building and running, it's time to go over the source code.
Extract the folder to someplace dedicated to iOS development source code. For this tutorial, we'll be assuming you're going to put it ~/ioslib.
2) Start a new iOS game project:
3) Make sure to delete the auto generated files, except for the Assets and LaunchScreen
4) We need to add SDL 2 as a sub project to your game project, so right click on your project and select Add Files:
In the SDL 2 source code folder you extracted, go to XCode, SDL, and select SDL.xcodeproj:
5) Before we continue, remember to always DOUBLE CHECK WHICH PROJECT YOU HAVE SELECTED. Because you have multiple projects in your project, it is very easy to mistakenly make changes to the SDL 2 project when you wanted to make changes to your main project or vice versa.
Select your main project, select the Info tab, select "Main storyboard file base name", and hit delete:
6) Go to Build Settings, select "All" and "Combined", and drag the Public Headers from the project to the Header Search Paths:
7) Go to Build Phases, open up Link Binary With Libraries, and click the plus to Add items:
Select the SDL2.framework from Framework-iOS:
8) Go to the General tab, under Frameworks, Libraries, and Embedded Content, set the framework to Embed and Sign:
9) Download the source for lesson 52. Add the source file to your project. In the SDL subproject inside of the project view, drag SDL/Library Source/main/uikit/SDL_uikit_main.c down to the same place as the tutorial source code.
To add media to your project, Add file to your main project, select the folder you want to add, and make sure to "Create folder references" when adding it:
10) Now you should have your source file, media files, and main file added to your project:
Now build and run your application. The simulator can take up to a minute to boot and run so give it time. With the application building and running, it's time to go over the source code.